If your Nespresso Magimix Inissia is actully giving you trouble and not making the perfect cup of coffee it used to, then this guide is exactly what you need! In this article, we will go through a detailed step-by-step tutorial on how to repair Nespresso Magimix Inissia. Whether you’re a DIY beginner or an experienced techie, you’ll find helpful tips and instructions here to get your machine running again. We have gathered info from various sources including a very detailed iFixit tutorial and an excellent video guide available here.
Introduction
The Nespresso Magimix Inissia is popular for its ease of use and compact design, but like any electronic device, it can face issues over time. Common problems include pump failures, leaks, unresponsive buttons, and error messages. Repairing these issues by yourself not only saves money but also gives you a better understanding of how your machine works. This guide is desinged to help you diagnose, troubleshoot and fix common problems with your Nespresso Magimix Inissia.
We will cover every aspect of the repair process from basic disassembly to advanced troubleshooting, along with maintenance tips to extend the lifespan of your machine. So, let’s dive into this step-by-step journey of repairing your beloved coffee maker.
Understanding the Common Issues
Before starting the repair, it is important to recognize what issues you might be facing. Here are some common problems that may indicate your Nespresso Magimix Inissia needs repair:
-
No Power or Boot Up Failures
The machine might not power on or could stop during the boot up process. This is often due to loose internal connections or a faulty power supply. -
Pump Malfunctions
If you notice weak coffee extraction or no water flow, the pump might be failing. The pump is essential for creating the pressure needed to brew the perfect cup. -
Water Leaks
Leaks can occur due to worn out seals or loose fittings. Water leakage not only messes up your countertop but can also damage internal components. -
Error Messages on Display
The machine sometimes shows error codes which might be due to electronic malfunctions or sensor issues. Understanding these error codes is key to finding a fix. -
Unresponsive Buttons
With regular use, buttons can wear out or get stuck. This may hinder your ability to operate the machine and could be a sign of internal issues.
Understanding these problems is the first step to repairing your machine and saving yourself from the hassle of buying a new one.
Tools and Materials You Will Need
Before starting any repair, make sure you have the necessary tools. Here is a list of the basic tools and materials you will need:
Essential Tools:
- Small Screwdrivers: A set of Phillips and flathead screwdrivers is must.
- Plastic Pry Tools: These help in opening the casing without causing damage.
- Tweezers: For handling small and delicate components.
- A Container: To keep screws and small parts safe.
- Gloves: To protect your hands and maintain cleanliness.
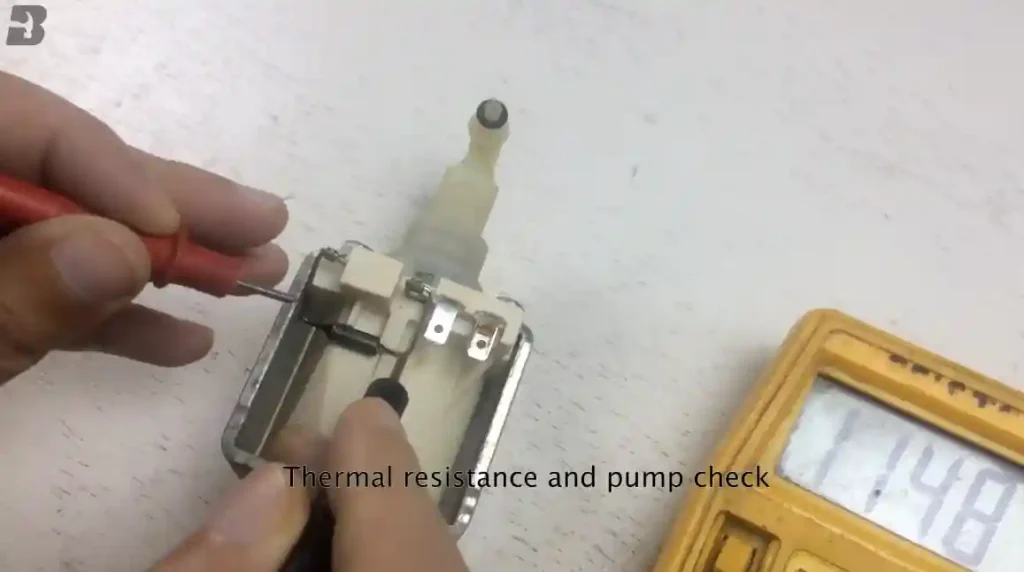
- Multimeter: (Optional) For testing electrical components.
- Compressed Air: For cleaning dust and debris.
Preparation Checklist:
- Unplug the machine from the power source.
- Clear a well-lit and spacious work area.
- Lay out all your tools before starting.
- Watch the video guide here for a visual reference.
- Read through the detailed iFixit tutorial available here for additional insights.
Taking time to prepare properly can make a big difference in how smooth the repair process will go.
Step-by-Step Disassembly Process
The disassembly process is the most delicate part of repairing your Nespresso Magimix Inissia. Follow these steps carefully:
1. Removing the Outer Casing
-
Locate All Screws:
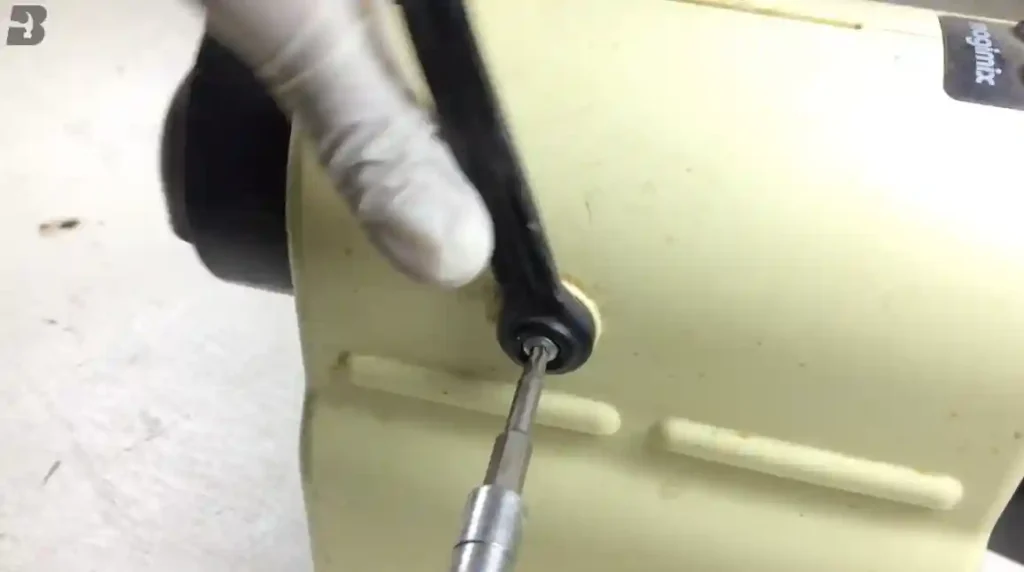
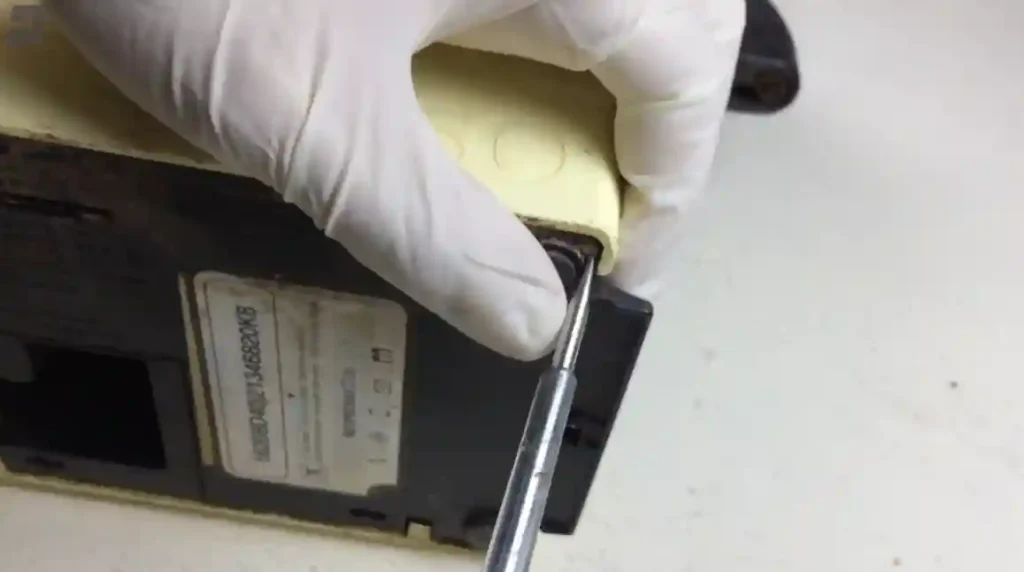
Begin by examining the top of the Nespresso Magimix Inissia machine’s casing. You will find two large screws on the top. Use an appropriate screwdriver to gently remove them, taking care not to damage the casing. -
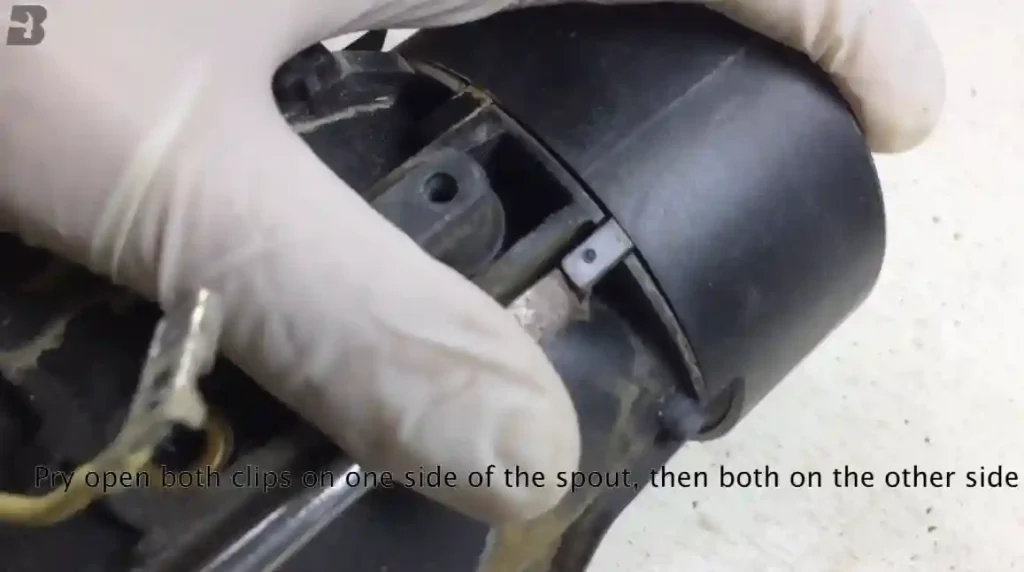
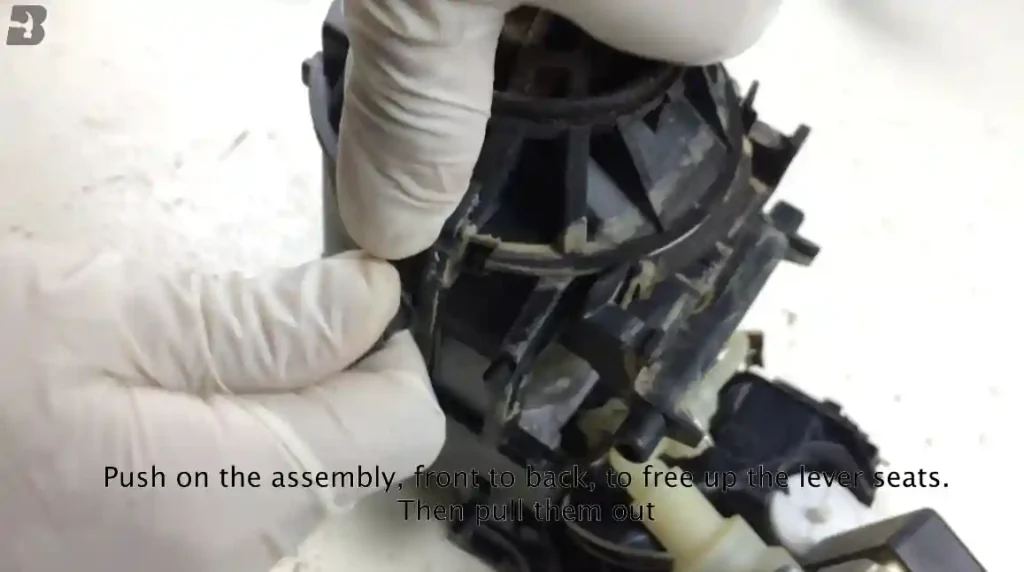
Pry Open the Casing:
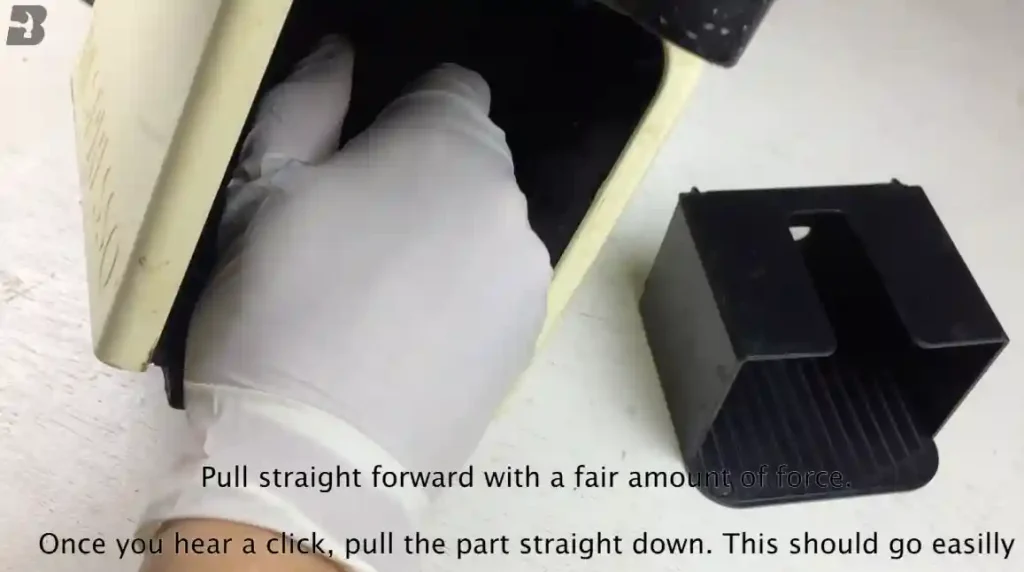
Apply firm pressure to pull the component straight forward. After hearing a click, gently pull the part downward; it should detach easily.
Gently use a plastic pry tool to open the outer casing. Avoid using metal tools which can scratch or break the plastic. -
Keep Track of Screws:
Place each screw in a container and, if possible, label them according to where they were removed from. This makes reassembly much easier.
2. Exposing the Internal Components
-
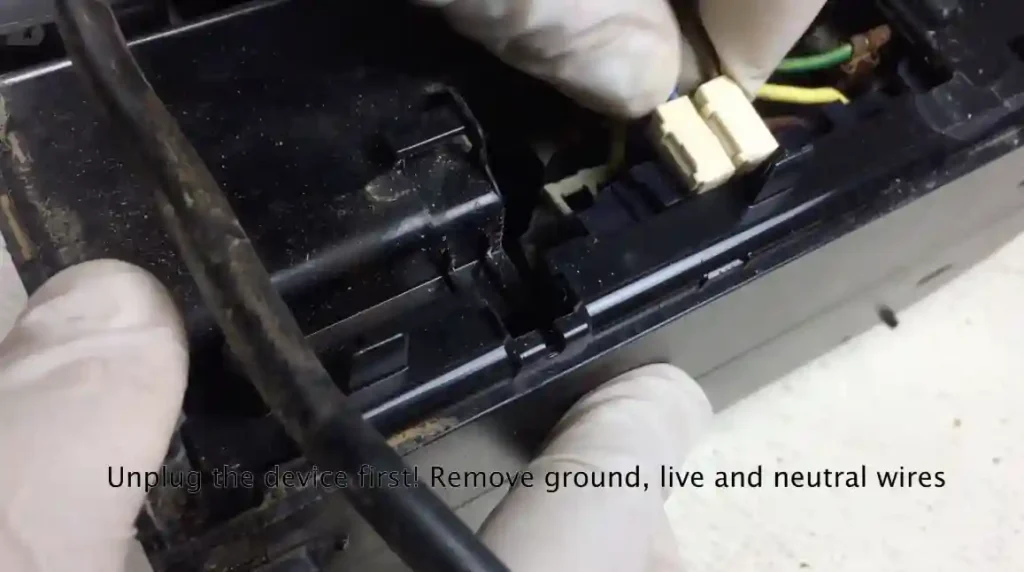
Disconnect Internal Wiring:
Once the casing is open, you’ll see several wires connecting to the control board. It’s a good idea to take photos before disconnecting to ensure you know where each wire goes. -
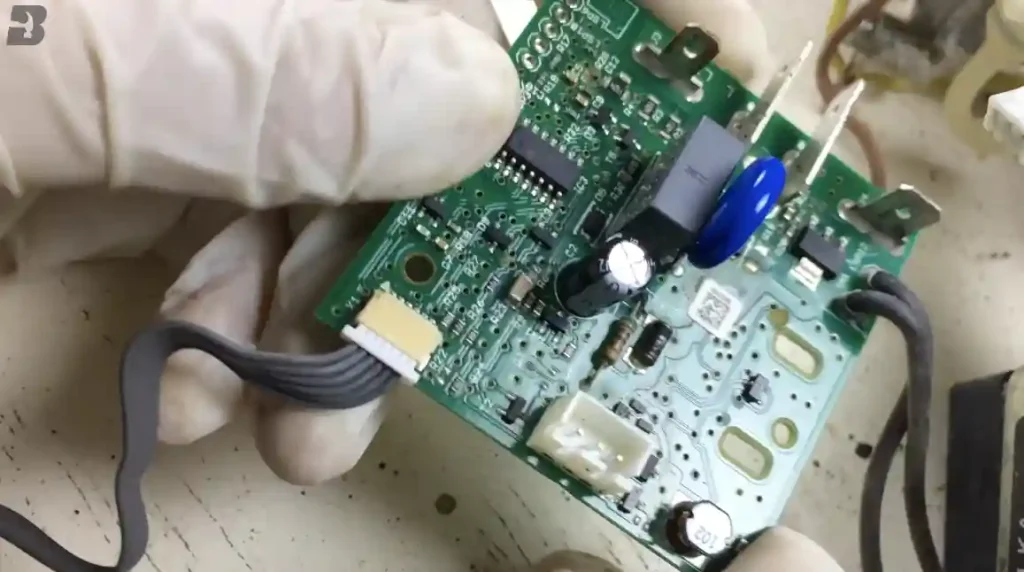
Remove the Control Board:
Carefully unscrew the control board and disconnect any connectors. Label or note their positions. -
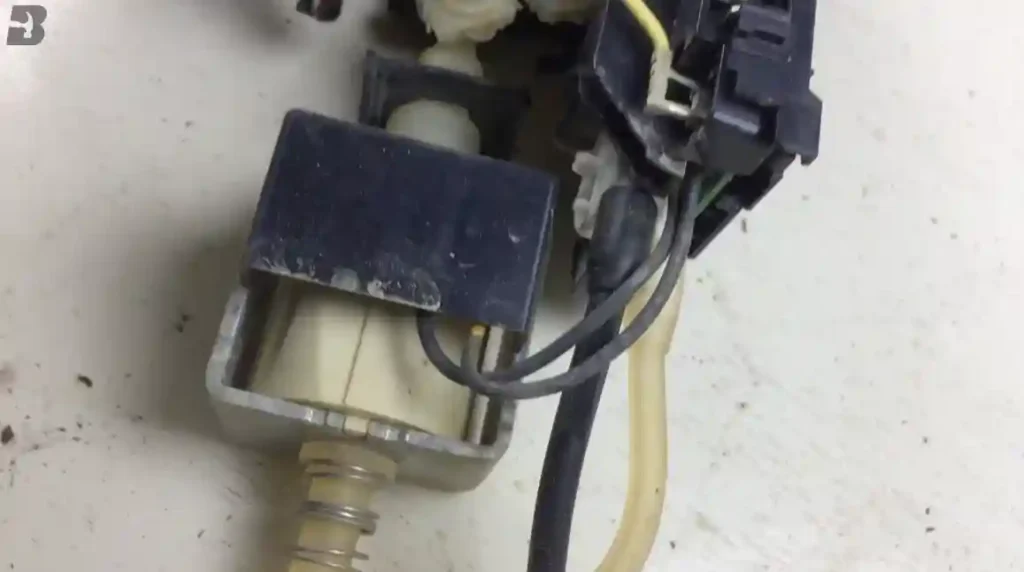
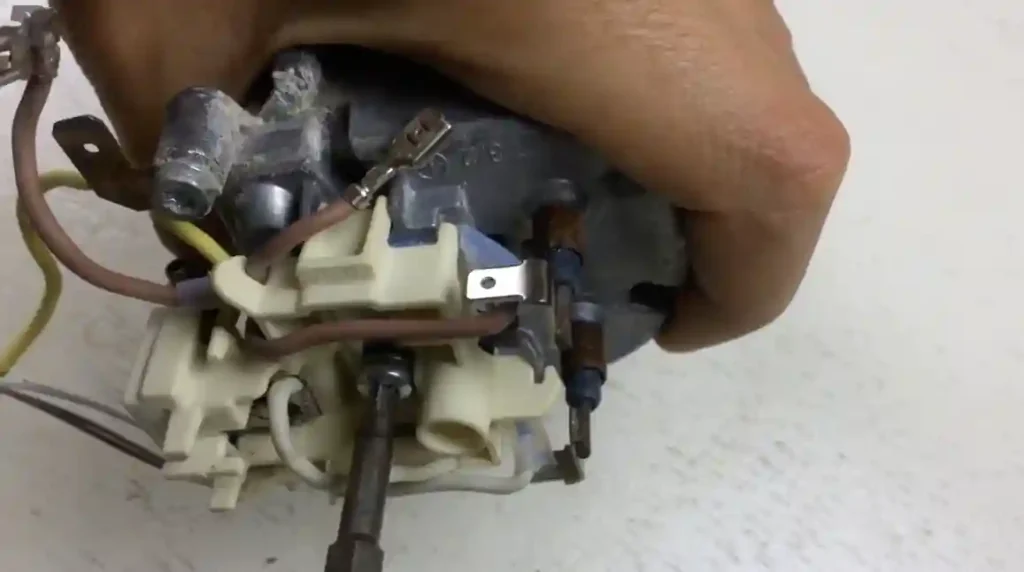
Detach the Pump Assembly:
The pump assembly is connected via hoses and electrical connectors. Remove these carefully and check for any visible signs of damage like burnt connectors or worn-out tubing.
3. Inspecting and Cleaning
-
Inspect Components:
Look for any obvious signs of damage like cracked plastic, burnt parts, or loose connectors. It is important to be thorough during this inspection. -
Clean the Interior:
Use compressed air or a soft brush to remove any dust and debris. Do not use water unless it is safe for electronic parts. -
Check Seals and Gaskets:
Inspect the seals carefully. If they are worn out or damaged, they might need replacing to prevent leaks.
4. Documenting the Process
-
Take Photos and Notes:
As you disassemble the machine, take photos of each step. Write down notes on the sequence and the location of parts. This documentation will be very helpful during reassembly.
Detailed Troubleshooting and Repairs
Now that you have disassembled your machine, you can start troubleshooting and fixing specific problems. Here are some common issues and how to repair them:
A. Repairing the Pump
-
Symptom:
The pump is not generating enough pressure or is making unusual noises. -
Steps to Fix:
- Clean the Pump: Remove any debris or coffee grounds that might be blocking the pump.
- Check Electrical Connections: Use a multimeter to test the pump’s electrical connections.
- Replace the Pump: If cleaning does not work, consider ordering a replacement pump. Make sure it is compatible with your machine.
-
Common Mistakes:
Be cautious not to damage the pump seals during cleaning. Mishandling can lead to more leaks or damage.
B. Fixing Water Leaks
-
Symptom:
Water is leaking from the machine during operation. -
Steps to Fix:
- Inspect Seals: Check all seals and gaskets for cracks or signs of wear.
- Tighten Connections: Ensure all hose connections and fittings are secure.
- Replace Worn Parts: If any seals or gaskets are worn, replace them with genuine parts.
-
Checklist for Leak Repair:
- Inspect each connection point.
- Use a soft cloth to dry off and check the leak points.
- Test the machine with a small amount of water to ensure the leak is fixed.
C. Resolving Control Board Issues
-
Symptom:
Error messages appear on the display, or buttons are unresponsive. -
Steps to Fix:
- Check Connectors: Make sure all connectors on the control board are securely attached.
- Reset the Machine: Sometimes, simply resetting the machine by disconnecting power for a few minutes can clear errors.
- Update Firmware: If applicable, check if your machine has firmware update options.
- Replace the Board: In cases of severe malfunction, the control board may need to be replaced.
-
Tips:
Always handle the control board with care as it is very sensitive to static and physical shocks.
Maintenance Tips to Extend the Lifespan
Regular maintenance is key to keeping your Nespresso Magimix Inissia in good working order. Here are some easy-to-follow maintenance tips:
Daily and Weekly Routines
-
Daily Cleaning:
Wipe the exterior of the machine with a damp cloth. Make sure to dry it afterwards. -
Weekly Inspection:
Check the water reservoir, buttons, and any visible parts for dirt or wear. This can help catch problems early.
Monthly and Quarterly Tasks
-
Descale the Machine:
It is recommended to descale your machine every 3-4 months, especially if you have hard water. Use a Nespresso-approved descaling solution. -
Internal Cleaning:
When you feel comfortable, open the machine and use compressed air to blow out any dust or coffee residue that might have accumulated. -
Lubrication:
Some moving parts may benefit from a light application of lubricant. Be sure to use a lubricant that is safe for electronic appliances.
Yearly Maintenance
-
Deep Inspection:
At least once a year, disassemble the machine partially to inspect internal components. This helps in identifying any parts that might need replacement before they fail completely. -
Professional Check-Up:
If you’re unsure about your repair skills or if the machine shows persistent issues, consider a professional check-up.
List of Common Maintenance Steps:
- Clean exterior and interior components regularly.
- Descale every 3-4 months.
- Inspect and replace worn seals or gaskets.
- Tighten any loose screws or connections.
- Test the pump and electrical connections periodically.
Regular maintenance not only improves the performance of your coffee machine but also prolongs its lifespan, ensuring you get many more cups of delicious coffee.
Reassembly: Putting Everything Back Together
After you have completed the necessary repairs, it is time to reassemble your Nespresso Magimix Inissia. Follow these steps carefully:
1. Reconnect Internal Wiring
-
Follow Your Documentation:
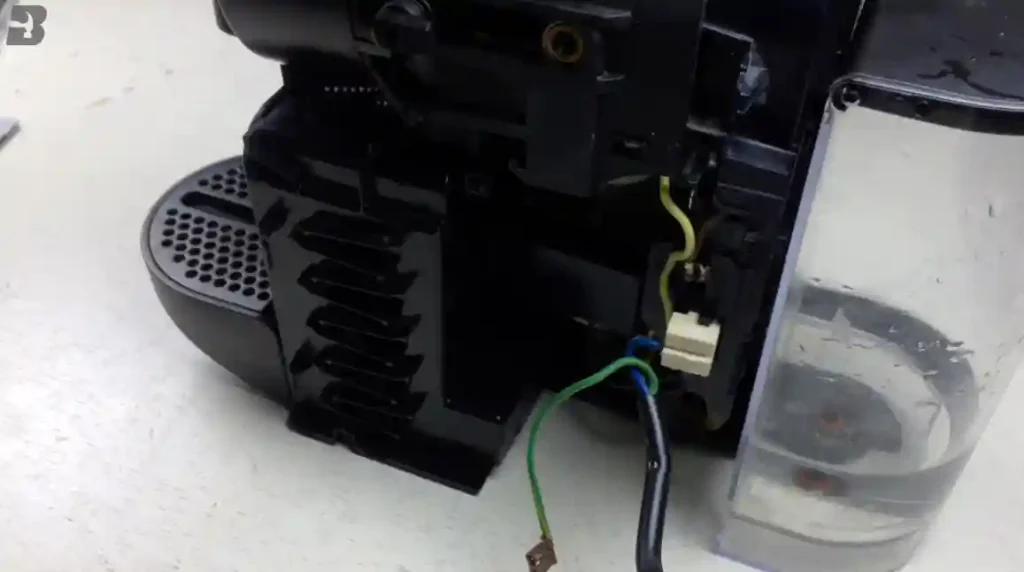
Refer to the photos and notes you took during disassembly. This will help you accurately reconnect wires to their respective connectors. -
Secure All Connectors:
Make sure that each connector is firmly attached. Loose wiring can result in malfunctioning or further damage.
2. Reinstall the Control Board and Pump
-
Mounting Components:
Place the control board back in its designated spot and reconnect all the cables. Secure the pump assembly similarly. -
Double Check the Connections:
Ensure that all connections are tight and that no wires are pinched or misplaced.
3. Reattach the Outer Casing
-
Align the Casing Correctly:
Make sure that the casing aligns well with the internal components. Use the previously removed screws to secure the casing. -
Replace Any Removed Rubber Feet:
If you removed any rubber feet or stickers, put them back in place as they also help in keeping the machine stable.
4. Final Testing
-
Power On and Test:
Plug the machine back into the power source and run a test brew. Check for any error messages, leaks, or unusual sounds. -
Troubleshoot If Necessary:
If something isn’t working right, refer back to your documentation and verify each step.
Advanced Troubleshooting and Common Pitfalls
For those who are more technically inclined, here are some advanced troubleshooting techniques and common pitfalls to avoid:
Advanced Electrical Diagnostics
-
Using a Multimeter:
A multimeter can help you measure voltage and resistance. Check the pump, control board, and other electronic components for proper functionality. -
Inspecting the Fuse:
Some models have internal fuses that might blow. Ensure the fuse is intact and replace it if necessary. -
Checking for Short Circuits:
Look out for any signs of burnt wiring or components. This might indicate a short circuit that needs to be fixed immediately.
Common Pitfalls and How to Avoid Them
-
Pitfall 1: Rushing the Process
Solution: Take your time with each step. Rushing can cause mistakes and even permanent damage to delicate parts. -
Pitfall 2: Misplacing Screws and Small Parts
Solution: Use a small container and label compartments for screws and parts. This makes reassembly much smoother. -
Pitfall 3: Forgetting to Document the Process
Solution: Always take photos and write down notes. This documentation is vital during the reassembly process. -
Pitfall 4: Using Incompatible Replacement Parts
Solution: Always verify the part number and compatibility before ordering replacements.
List of Extra Tips for Avoiding Mistakes:
- Work in a clean, well-lit area.
- Organize your tools before beginning.
- Take breaks if you feel rushed.
- Re-read instructions before moving to the next step.
Frequently Asked Questions
Below are some FAQs that many users have when attempting to repair their Nespresso Magimix Inissia:
Q1: How often should I descale my machine?
It is generally recommended to descale every 3-4 months, but this can vary based on water hardness and usage frequency.
Q2: Can I replace the pump by myself?
Yes, if you have the right tools and follow the instructions carefully, replacing the pump is doable. However, ensure that you disconnect the power and follow safety guidelines.
Q3: What are the signs of a failing control board?
Common signs include error messages, unresponsive buttons, and inconsistent performance. Check for loose connections or burnt components.
Q4: Is it safe to repair the machine on my own?
While many repairs can be safely performed at home, always ensure you unplug the machine and use caution. If you’re not confident, consider professional repair services.
Q5: Where can I get spare parts?
Spare parts are available online through various vendors or directly from the manufacturer. Always verify compatibility with your specific model.
Conclusion
Repairing your Nespresso Magimix Inissia can seem a bit daunting at first, but with a bit of patience and careful attention to details, you can fix many common issues by yourself. This guide has walked you through the disassembly, troubleshooting, repair, and reassembly process step-by-step. Remember that regular maintenance is key to preventing future issues and ensuring that your machine continues to brew that perfect cup of coffee.
By following the steps in this article, referencing the helpful video guide here, and using the detailed iFixit tutorial as a resource, you are well on your way to becoming a proficient DIY repairer for your Nespresso Magimix Inissia. Don’t get discouraged if you encounter a few bumps along the way—each mistake is a learning experience that makes you better at handling similar issues in the future.
Always take your time, document your work, and ensure that all components are securely reassembled before testing. With these repair skills, you not only save money but also gain a deeper appreciation for the engineering behind your coffee machine. Enjoy the satisfaction of fixing your own gadget, and here’s to many more delicious cups of coffee!
Additional Tips and Final Reminders
-
Safety First:
Always unplug the machine before starting any repair work. Handle electronic components with care and avoid using water on sensitive parts. -
Keep a Spare Kit:
Maintain a small repair kit with essential tools and spare parts. This can come in handy if you face any issues in the future. -
Stay Updated:
Check online forums and video tutorials regularly for any new tips or common issues reported by other users. -
Practice Patience:
Repair work can sometimes be frustrating. Take breaks and double-check your work before proceeding.
By following these guidelines, you can ensure that your repair process is both safe and effective. Remember, a well-maintained Nespresso Magimix Inissia will keep serving you quality espresso for years to come, and every repair you perform adds to your skillset as a DIY enthusiast.
Happy repairing and enjoy your coffee!

